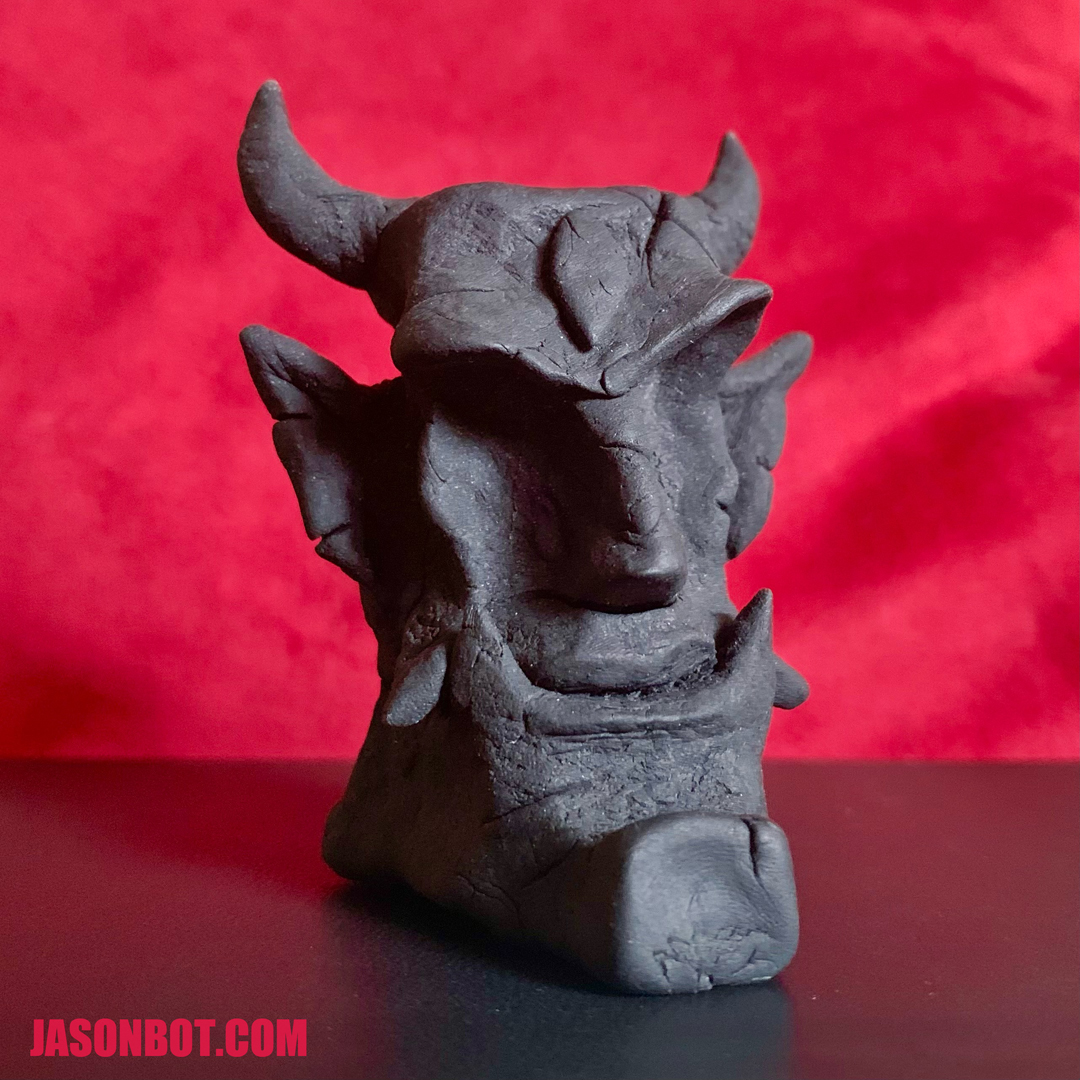
A quick sculpt for no reason. 😈
A quick sculpt for no reason. 😈
I’m just a dabbler when it comes to sculpting, but it’s a lot of fun.
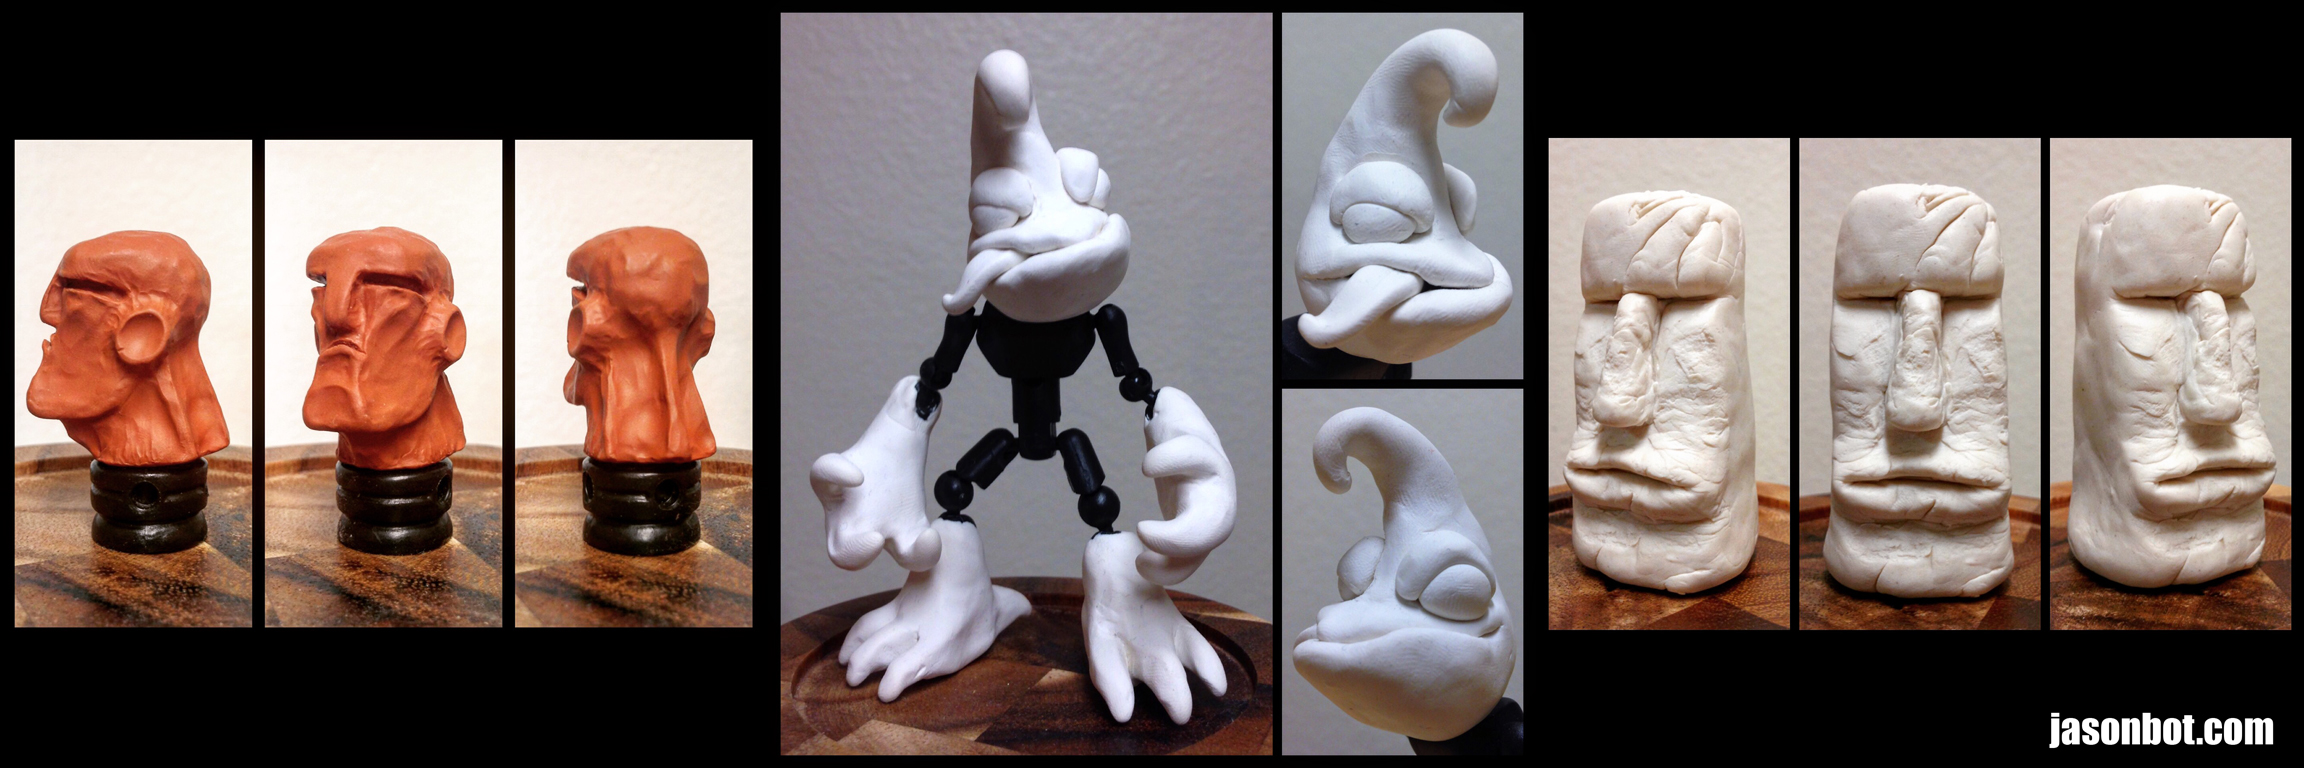
The reddish one is a random space golem guy I made out of Sculpey… he has a Glyos piece in his neck but I still need to build a body for him. This sculpt is from 2010ish.
The alien froggy dude is another older Sculpey piece (from 2007ish). The body is a Stikfas figure but I made the limbs too large though–the joints can’t really support the weight!
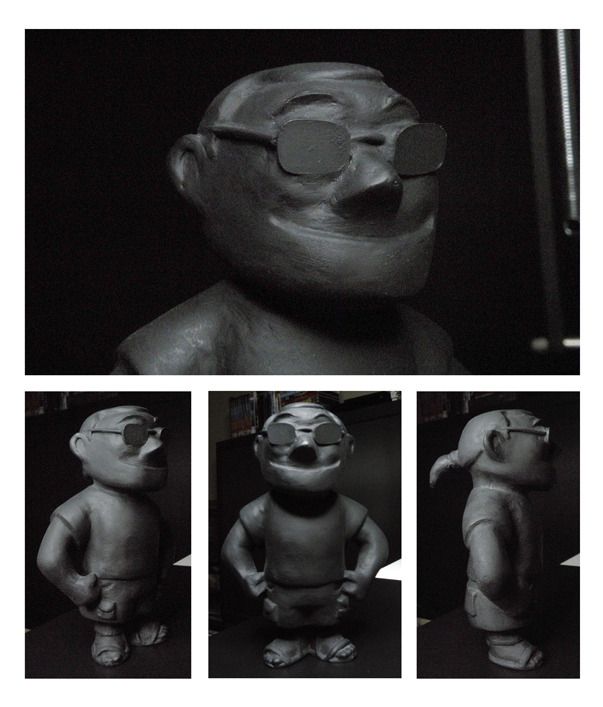
Last one is a Moai-esque head sculpt from a few weeks ago. I was hanging out with my delinquent toy pals and we got blind boxes that had the toys submerged in a Play-Doh-like clay. I sculpted this while we were nerding out in the food court. I’ve left it out to dry since then and it’s pretty solid now!
If you do something like give me a pair of cool-looking goggles from Restoration Hardware because I couldn’t find them myself, chances are I will write you a thank you note with a drawing on the envelope. And if the first syllable of your named rhymes with hell, that drawing will probably depict you as Hellboy (Hellvin), and me as Abe Sapien (Jabe Sapien?):
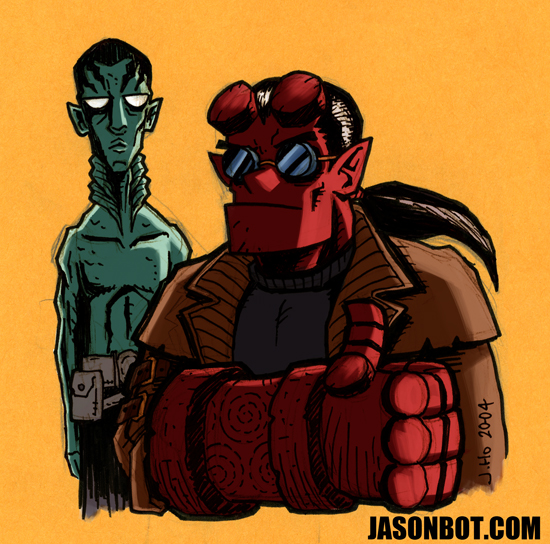
This is from several years ago, which you might have guessed from the date in the signature, and from the fact that I’m depicted without my passé-but-still-present mohawk. The background you see is actual envelope (with minor touch-ups), which I left in for flava. The computer colors are new, and were laid in just this past weekend.
A few years ago that same friend was coming up on a noteworthy birthday, and his wife (also a dear friend) asked me to design a mini-statue of him to commemorate the occasion. I whipped up a quick turnaround for her sculptor:
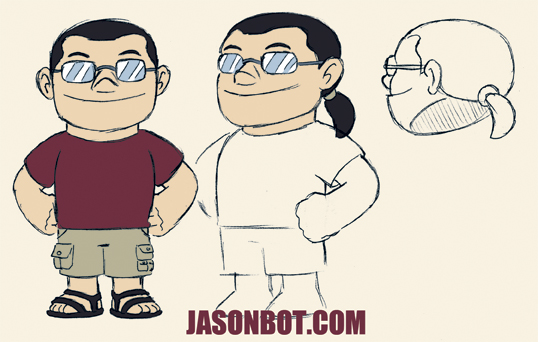
And here’s what the mini-statue looks like:
It’s a lot of fun to see your work translated into the 3rd dimension! My apologies, I don’t remember the sculptor’s name/URL–that info will be added here if I can find it.
(This post contains two pieces of artwork by me, so that brings the total count of missed posts down to 5!)
I set up another Sculpey project for my niece and I, very similar to last year’s project. It’s not just the Year of the Rabbit, it’s the Year of the METAL Rabbit, so I chose a robotic rabbit as our subject. Here are the results:
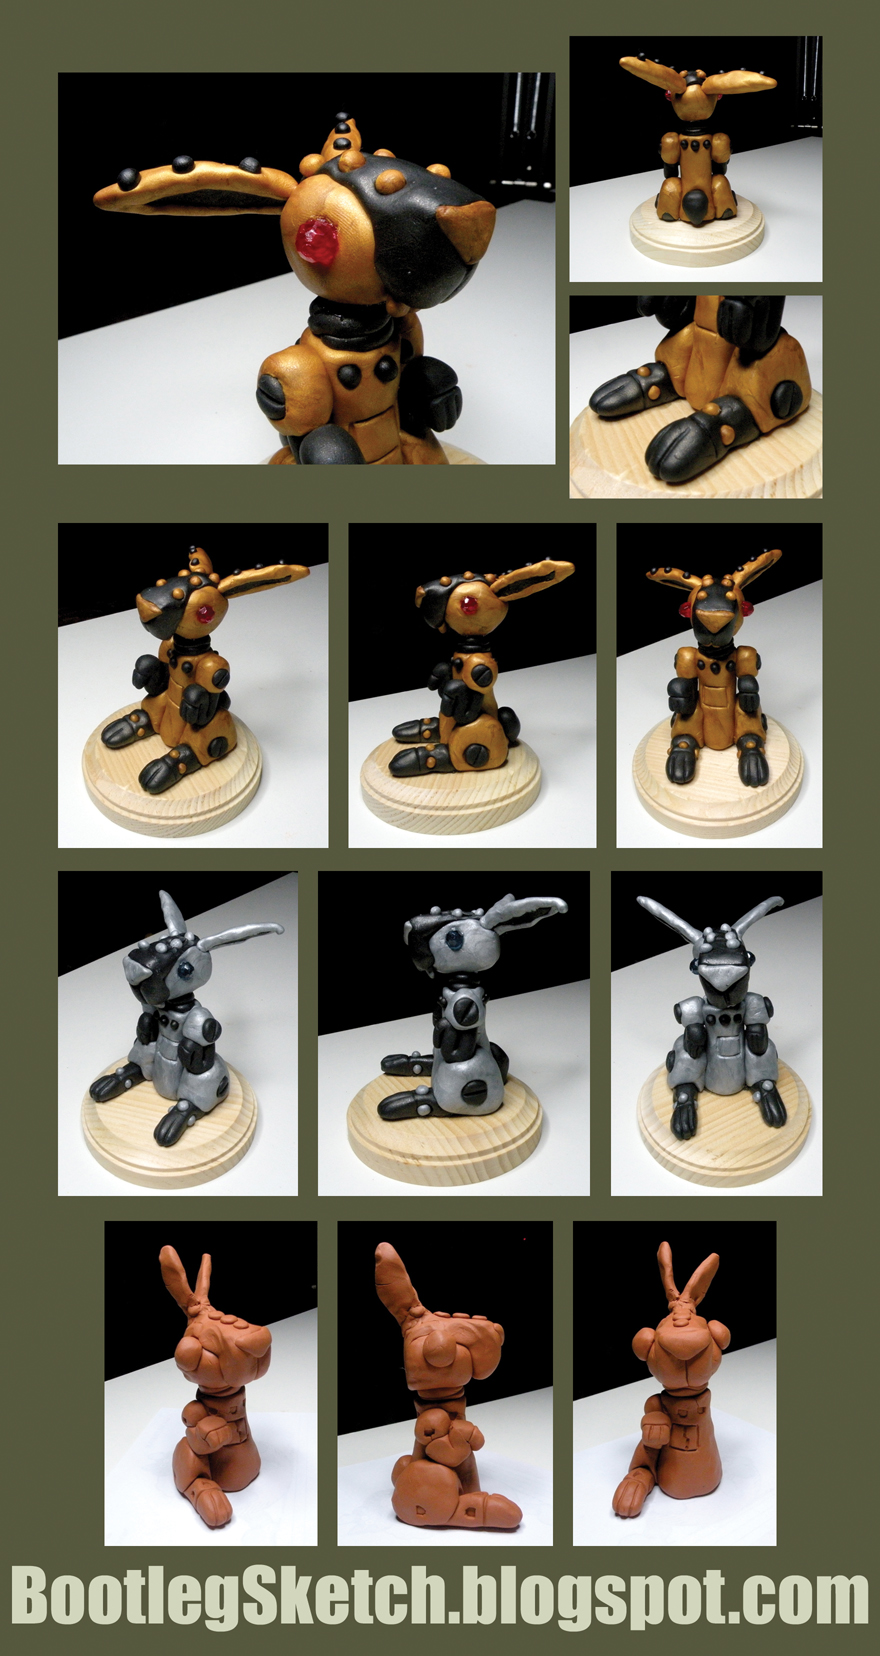
The gold rabbit with the red eyes is mine, the silver one with the dark blue eyes is my niece’s, and the terra cotta one at the bottom is the prototype that I made while planning the project. If you’re curious about the process, please check out last year’s project (the process we used for this year was very similar). I would point out that my rabbit has extra “rivets” in the ears–I wasn’t sure how I felt about that (maybe it’s too busy?), so I didn’t have my niece add that to her sculpture. All in all, I think these turned out nicely!
One of my brothers-in-law observed that the rabbits have a Cylon-esque quality. However, knowing myself, if there’s any subconscious sci-fi influence at work here, it’s probably from the Daleks! For the record, if this post had been made a month later, the title would have been EASTERMINATE!!!
I’ve been itching to get back to some sculpting, and finally had a chance over the long weekend. This was supposed to be a cuckoo, but the crest got a bit too big, and instead it looks like some kind of gold-colored cardinal:

The burnt tips on the crest and tail feathers are strictly a happy accident–I let this thing cook for too long! The gold Premo Sculpey that I used was a bit harder and slightly more crumbly than the other types of Sculpey I’ve tried, and unfortunately there were a few cracks after the baking. I don’t think volume or size was the problem, as my previous tiger project had no cracks whatsoever (the bird is just under 2 inches tall, while the tiger is closer to 3 inches tall, and obviously much longer). The transition between the neck and chest is somewhat awkward, and the head got flattened a bit along the way, but overall I’m pretty happy with how this turned out.
Sculpting is a lot of fun. Maybe it’s because it’s a change of pace, or because I’m not so familiar with the process of it, but I find the whole experience to be really relaxing. Hopefully I’ll be able to set aside some more sculpting time in the near future!
Changing it up a bit today–step into the third dimension with me, won’t you?
Knowing in advance that I would be watching over my seven-year-old niece on the day of of Chinese New Year’s Eve, I planned a little art project for the two of us. All it took was some Sculpey (colors: terra cotta, white, and black), thin wooden dowels (to internally support the connection between the head and body), some beads (for the eyes), two wooden plaques, and some high-strength adhesive (to glue the beads in, and to glue the finished tiger to the wooden plaque):
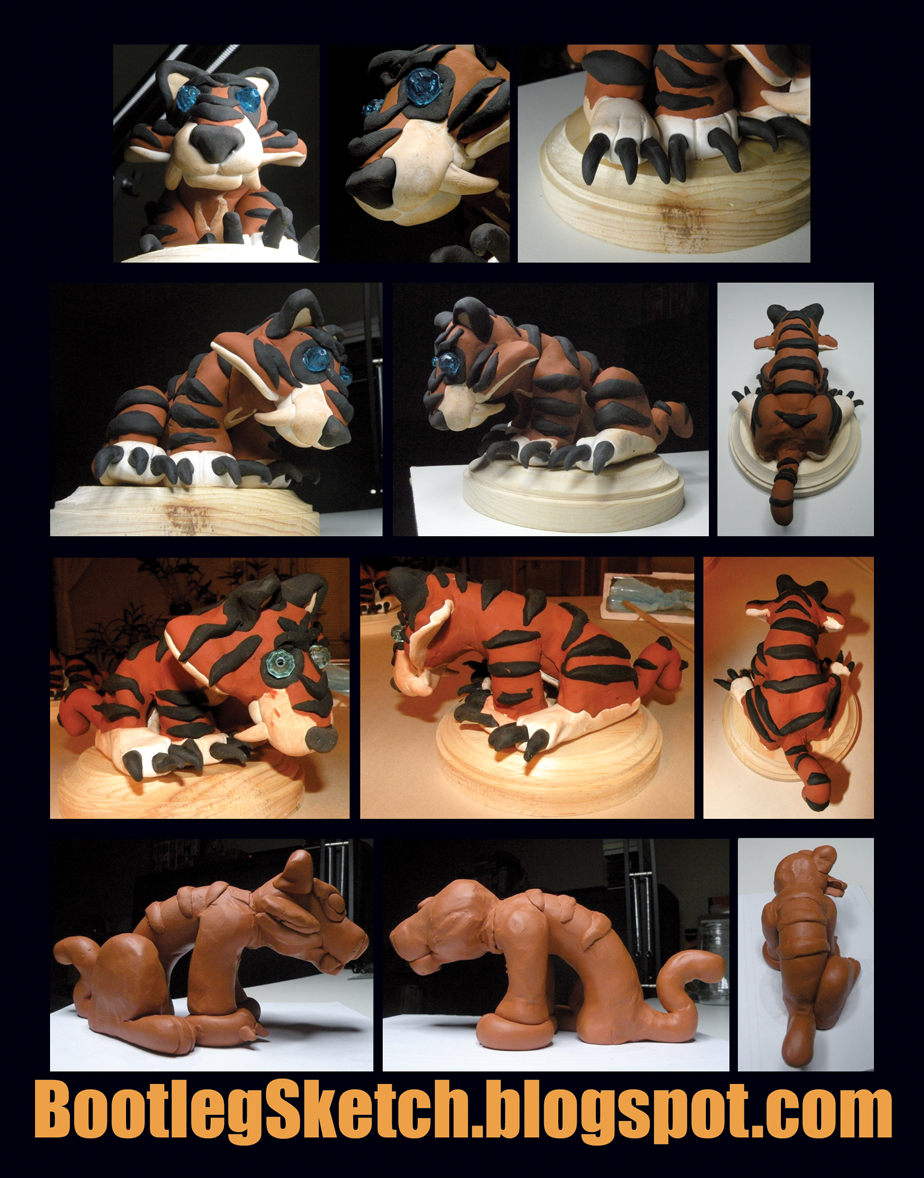
The top two rows are photos of the tiger that I sculpted, the third row is my niece’s excellent work, and the fourth row is the partially finished prototype that I sculpted a few days prior to project-day.
To break it down quickly–I sketched out the rough geometric shapes that would be necessary to build the tiger, and then built a partial prototype to make sure that it would be do-able, and made some basic notes about how much Sculpey would be necessary for each part. I planned out the project so that I would sculpt along with my niece, showing her along the way how to make each component.
On project-day, the first components that I sculpted with my niece were the claws, teeth, nose, and inner ear. We baked those pieces first, so that they could be easily inserted into the un-baked components. After that we sculpted all the white parts, then the orange (terra cotta) parts. Next, we assembled the components, and lastly sculpted the black parts and added those last. It was important to move from the lightest colors to the darkest, because Sculpey leaves just enough residue on your hands to stain the other colors. It was inevitable that some of the white would get stained, but the results would have been a lot messier if we had started with black.
My niece did a great job–she really didn’t need much help creating the components, except for the stripes, which were all cut by me. I think you can tell in the application of the stripes that she and I were both starting to feel fatigue, and I sort of rushed us through that part because I just wanted to finish the project while I still had her attention.
After the sculpting and assembling, we made indentations in the head with “decoy” beads in the spots where we wanted the eyes to be. We removed the beads, and then baked our almost-finished sculptures. I didn’t want to bake the beads, because I didn’t know how the heat would affect the plastic. And I threw away the “decoy” beads, because they now had residue from the black sculpy on them.
After the sculptures baked, we let them cool, and we each picked out eye colors from the bag of multi-colored beads. My niece chose a lighter sky-blue, while I opted for a mid-range blue/cyan. I don’t trust seven-year-olds with high-strength adhesive, plus at this point her attention was fully absorbed by the TV, so I attached the eyes for both sculptures, and then fixed each tiger to its wooden base.
If you compare the finished pieces to the prototype, you can see that the prototype actually has a better, more defined torso. I can only attribute this to the fact that I didn’t have the time to fine tune each piece on project-day, but overall I think things turned out well, and it was a lot of fun. I’m a so-so sculptor at age thirty-decrepit, but my niece is advanced at age seven!